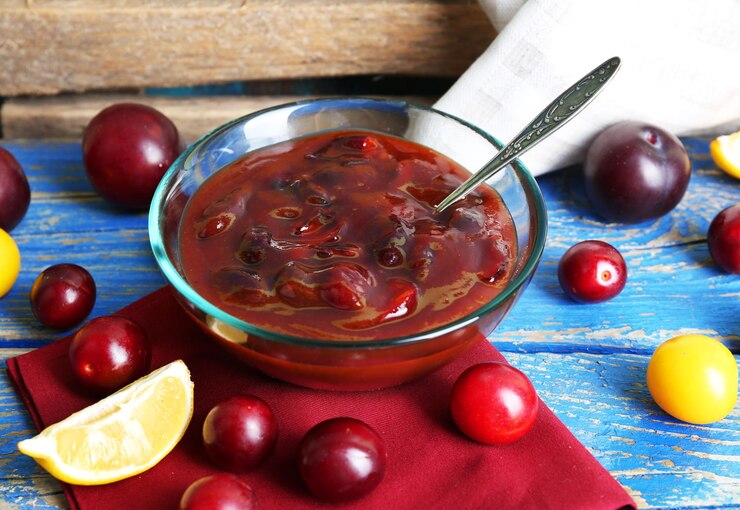
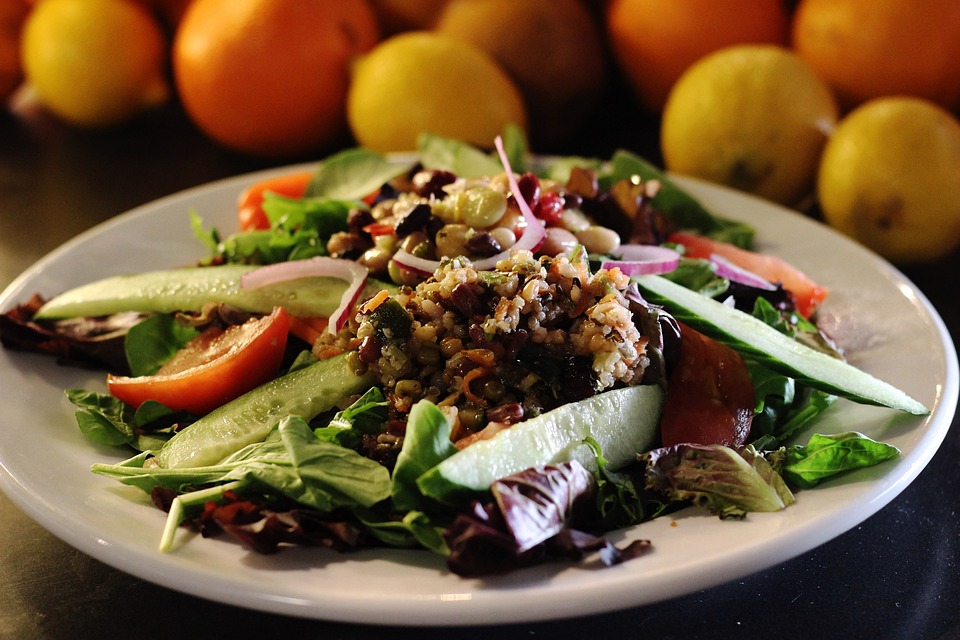
Winter Vegetable Frittata: A Perfect Cozy Meal!

Winter Vegetable Frittata

Why You'll Love This Recipe

This Winter Vegetable Frittata is the ultimate comfort dish to warm you up during chilly days. Packed with seasonal vegetables, rich flavors, and wholesome ingredients, it’s an easy-to-make meal perfect for breakfast, lunch, or dinner. Whether you’re hosting a cozy brunch or meal prepping for the week, this recipe is sure to become a favorite!

Ingredients

Gather these simple ingredients to make your Winter Vegetable Frittata:

  • 6 large eggs
  • 1/4 cup milk (dairy or plant-based)
  • 1 cup diced butternut squash
  • 1 cup chopped kale or spinach
  • 1/2 cup diced red bell pepper
  • 1/4 cup sliced green onions
  • 1/2 cup shredded cheese (optional, choose your favorite type)
  • 2 tbsp olive oil or butter
  • Salt and pepper to taste
  • Optional: A pinch of smoked paprika or dried herbs

Preparation Tips

Use fresh, seasonal winter vegetables for the best flavor. Feel free to swap ingredients based on what you have on hand—this recipe is incredibly versatile!

Instructions

  1. Preheat the oven: Set your oven to 375°F (190°C). Lightly grease a 9-inch oven-safe skillet or baking dish with olive oil or butter.
  2. Sauté the vegetables: Heat olive oil or butter in the skillet over medium heat. Add the butternut squash and cook for 5-7 minutes until slightly softened. Stir in the kale, bell pepper, and green onions, cooking for another 2-3 minutes.
  3. Prepare the egg mixture: In a mixing bowl, whisk together the eggs, milk, salt, pepper, and optional seasonings. Stir in half of the shredded cheese if using.
  4. Combine and cook: Pour the egg mixture evenly over the sautéed vegetables in the skillet. Let it cook on the stovetop for 2-3 minutes to set the edges.
  5. Bake: Transfer the skillet to the preheated oven and bake for 15-20 minutes, or until the frittata is fully set and slightly golden on top.
  6. Serve: Allow the frittata to cool for 5 minutes before slicing. Serve warm with a side of crusty bread or a fresh salad.

Serving Suggestions

This frittata pairs wonderfully with a dollop of sour cream or Greek yogurt. Add a sprinkle of fresh herbs like parsley or chives for an extra pop of flavor. It’s also great for meal prep—store leftovers in an airtight container in the refrigerator for up to 3 days.

Pro Tip

For a heartier version, add cooked sausage, bacon, or your favorite plant-based protein to the mix. You can also experiment with different cheese varieties to suit your taste!
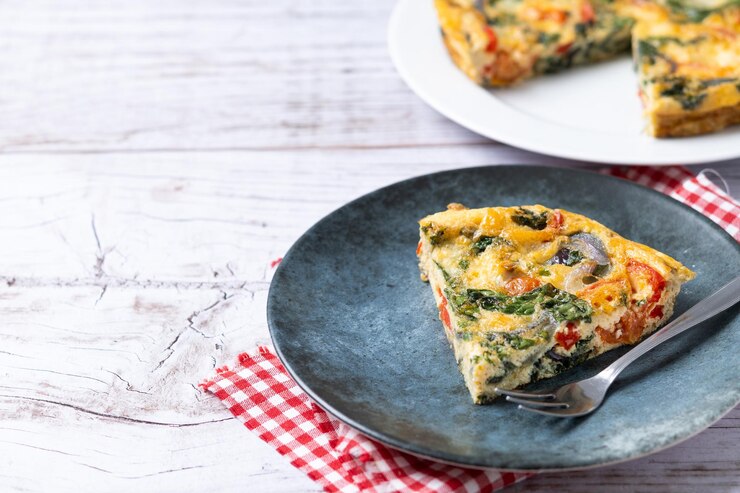
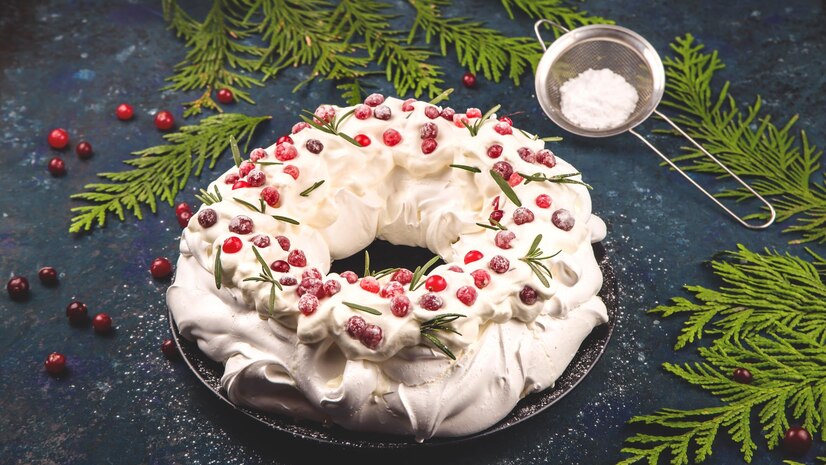
A Healthy Twist: Pavlova Wreath Recipe

Healthy Pavlova Wreath

Why You'll Love This Healthy Recipe

This Healthy Pavlova Wreath offers all the festive flavors of the traditional dessert, but with a lighter twist! Made with a naturally sweet meringue base, topped with creamy Greek yogurt instead of whipped cream, and loaded with fresh fruits, this version is lower in sugar and packed with nutrients. It's perfect for those who want to indulge in a delicious holiday treat without the guilt.

Ingredients

Gather these simple, healthy ingredients to make your Pavlova Wreath:

  • 4 large egg whites
  • 1/4 cup natural sweetener like honey or maple syrup
  • 1 tsp vanilla extract
  • 1 tsp white vinegar
  • 1 tbsp cornstarch
  • 1 cup plain Greek yogurt (for a creamy topping)
  • 1 tbsp honey (for sweetening the yogurt)
  • 1 tsp vanilla extract (for the yogurt)
  • Fresh fruit: strawberries, kiwis, blueberries, and pomegranate seeds
  • Fresh mint leaves for garnish (optional)

Preparation Tips

For the best results, ensure your mixing bowl and beaters are completely free of any grease. You can also prepare the meringue base a day ahead and store it in an airtight container to maintain its crispness. Opt for organic or locally-sourced fruits for maximum flavor and nutrition.

Instructions

  1. Preheat the oven: Set your oven to 275°F (135°C). Line a baking sheet with parchment paper and draw a circle (about 8-10 inches in diameter) as a guide for your meringue wreath.
  2. Make the meringue: In a clean, dry bowl, beat the egg whites with an electric mixer on medium speed until soft peaks form. Gradually add the honey or maple syrup, one tablespoon at a time, and continue to beat until stiff peaks form and the meringue is glossy.
  3. Finish the meringue: Gently fold in the vanilla extract, vinegar, and cornstarch until well combined.
  4. Shape the wreath: Spoon the meringue onto the parchment paper inside the drawn circle, spreading it out to form a wreath shape with a slight dip in the center.
  5. Bake: Bake the meringue for 1 hour and 15 minutes, or until it’s firm to the touch and lightly golden. Turn off the oven and let the meringue cool completely inside with the door slightly ajar.
  6. Prepare the Greek yogurt topping: In a mixing bowl, whisk the Greek yogurt, honey, and vanilla extract until smooth and well combined.
  7. Assemble the wreath: Once the meringue has cooled, carefully transfer it to a serving platter. Spread the Greek yogurt mixture over the center of the meringue base, leaving the edges exposed.
  8. Top with fruit: Decorate with fresh fruit such as sliced strawberries, kiwis, blueberries, and pomegranate seeds. Garnish with fresh mint leaves for an extra festive touch.

Serving Suggestions

This healthier Pavlova Wreath is perfect as a lighter dessert or a fun holiday centerpiece. Pair it with herbal tea or a refreshing sparkling water for a guilt-free indulgence. It’s great for family gatherings or as a holiday treat for anyone looking to enjoy a healthier sweet option.

Pro Tip

For a fun variation, try adding a sprinkle of chia seeds or flaxseeds on top for an extra boost of fiber and omega-3s. You can also experiment with other natural sweeteners like stevia or agave syrup for a sugar-free version.

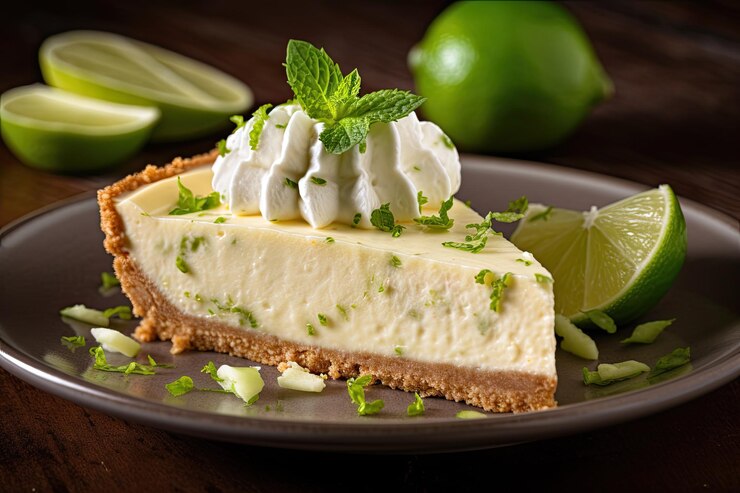
Healthy Key Lime Pie: A Refreshing Holiday Dessert!

Healthy Key Lime Pie

Why You'll Love This Recipe

This Healthy Key Lime Pie is the ultimate guilt-free treat for the holiday season. Bursting with the tangy flavors of lime and a creamy texture, this pie is a perfect balance of indulgence and health-conscious ingredients. It’s easy to make, packed with natural sweetness, and guaranteed to impress your family and friends at any holiday gathering!

Ingredients

To create this delicious holiday dessert, you'll need:

  • 1 1/2 cups of graham cracker crumbs (or almond flour for a gluten-free option)
  • 3 tbsp coconut oil or unsalted butter, melted
  • 1/4 cup honey or maple syrup
  • 1 can (14 oz) light coconut milk
  • 1/2 cup plain Greek yogurt
  • 1/2 cup fresh lime juice (about 4-5 limes)
  • 2 tsp lime zest
  • 1/4 cup natural sweetener (honey, agave, or stevia to taste)
  • 2 tsp gelatin (or agar-agar for a vegetarian option)

Preparation Tips

Use freshly squeezed lime juice for the best flavor. For a vibrant green hue, you can add a touch of natural food coloring (optional). Make sure your Greek yogurt is thick and creamy to ensure the perfect pie texture!

Instructions

  1. Prepare the crust: Preheat your oven to 350°F (175°C). In a mixing bowl, combine the graham cracker crumbs, melted coconut oil or butter, and honey. Press the mixture firmly into a 9-inch pie pan to form an even crust. Bake for 8-10 minutes, then let it cool completely.
  2. Make the filling: In a saucepan over medium heat, whisk together the coconut milk, Greek yogurt, lime juice, lime zest, and sweetener. Heat the mixture gently until it begins to steam, but do not boil.
  3. Add the gelatin: In a small bowl, dissolve the gelatin in 2 tbsp of warm water. Stir until fully dissolved, then whisk it into the lime mixture. Continue stirring over low heat for 2-3 minutes until the mixture thickens slightly.
  4. Assemble the pie: Pour the filling into the cooled crust. Smooth the top with a spatula and refrigerate for at least 4 hours, or until fully set.
  5. Garnish and serve: Before serving, decorate the pie with lime slices, additional zest, or a dollop of whipped cream for a festive touch.

Serving Suggestions

Serve chilled for the most refreshing flavor. Pair it with a hot cup of herbal tea or coffee to complement the zesty lime notes. It’s a delightful way to end any holiday meal!

Pro Tip

For an extra indulgent touch, drizzle a bit of dark chocolate over the pie or sprinkle crushed nuts on top. You can also make mini versions using a muffin tin for individual servings!

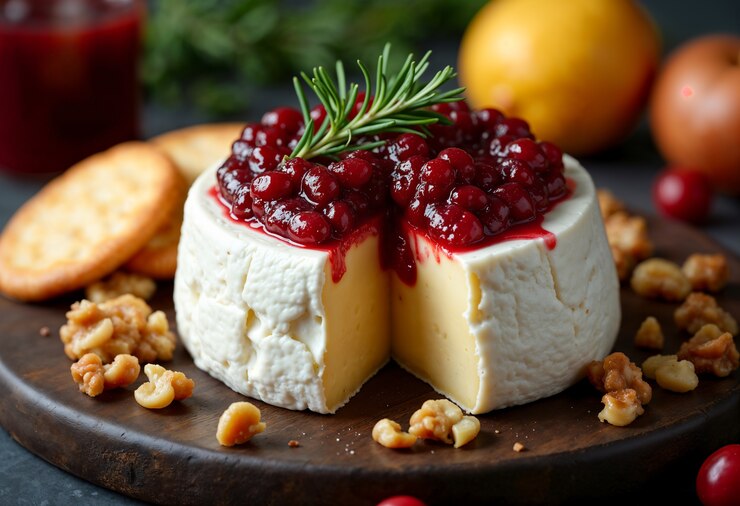
A Festive Treat: Baked Camembert with Cranberries!

Baked Camembert with Cranberries

Why You'll Love This Recipe

This Baked Camembert with Cranberries is a delightful combination of creamy, melted cheese and a tangy-sweet cranberry topping. It’s perfect for holiday gatherings or as a cozy appetizer. This healthy twist uses natural ingredients to create a nutritious, flavorful treat that everyone will enjoy!

Ingredients

Here’s what you’ll need to make this healthy and delicious baked camembert:

  • 1 whole Camembert cheese (200-250g)
  • 1/2 cup fresh or frozen cranberries
  • 2 tbsp honey or maple syrup
  • 1 tsp fresh rosemary (chopped)
  • 1/4 cup walnuts or pecans (optional, for added crunch)
  • Whole-grain crackers or fresh vegetable sticks for serving

Preparation Tips

Use fresh cranberries for the best flavor and vibrant color. Ensure the Camembert is at room temperature before baking for even melting. Choose whole-grain crackers or vegetable sticks to keep the dish wholesome and nutritious.

Instructions

  1. Prepare the topping: In a small saucepan, combine cranberries, honey or maple syrup, and rosemary. Cook over medium heat until the cranberries soften and the mixture thickens slightly.
  2. Score the cheese: Lightly score the top of the Camembert with a knife in a crisscross pattern. Place it in a small, oven-safe dish.
  3. Add the topping: Spoon the cranberry mixture over the top of the Camembert. Sprinkle with walnuts or pecans if desired.
  4. Bake: Preheat your oven to 375°F (190°C). Bake the Camembert for 12-15 minutes, or until the cheese is soft and gooey.
  5. Serve: Remove from the oven and serve immediately with whole-grain crackers or fresh vegetable sticks.

Serving Suggestions

Pair this baked Camembert with a crisp green salad or fresh fruits like apple slices or pear wedges for a balanced appetizer. It also complements a festive charcuterie board beautifully.

Pro Tip

For an extra burst of flavor, add a pinch of orange zest to the cranberry mixture. You can also drizzle a little balsamic glaze over the top before serving for a gourmet touch!

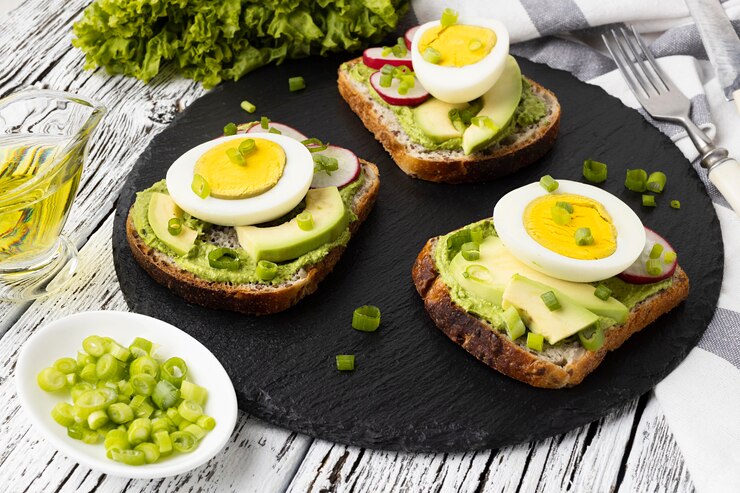
Healthy & Delicious: Sandwiches with Egg and Avocado!

Egg and Avocado Sandwiches

Why You'll Love This Recipe

These Egg and Avocado Sandwiches are the perfect combination of creamy avocado and protein-packed eggs, making them a satisfying and healthy choice for any meal. Whether you're looking for a quick breakfast or a wholesome lunch, these sandwiches will leave you feeling full and energized. Packed with nutrients and healthy fats, this recipe is simple, delicious, and easy to make!

Ingredients

Here’s what you’ll need to make these delicious and healthy sandwiches:

  • 2 eggs (cooked to your liking)
  • 1 ripe avocado
  • 2 slices whole-grain or sourdough bread
  • 1 tbsp olive oil or butter (for toasting)
  • Salt and pepper to taste
  • Optional: fresh herbs (like cilantro or parsley), lemon juice, or hot sauce for extra flavor

Preparation Tips

For the best flavor and texture, make sure your avocado is ripe. Toast your bread to a golden crisp for added crunch. Experiment with different seasonings like chili flakes or garlic powder to elevate the taste!

Instructions

  1. Cook the eggs: Heat a pan over medium heat and cook the eggs to your liking (fried, scrambled, or poached).
  2. Prepare the avocado: While the eggs cook, slice the avocado in half, remove the pit, and scoop out the flesh. Mash it in a bowl with a fork, and season with salt, pepper, and optional lemon juice.
  3. Toast the bread: Lightly toast the bread slices in a pan with olive oil or butter until golden brown and crispy.
  4. Assemble the sandwich: Spread the mashed avocado onto one slice of toasted bread, and top with the cooked eggs. Add any additional seasonings or toppings if desired.
  5. Serve: Place the second slice of bread on top and enjoy immediately, or cut into halves for a perfect snack.

Serving Suggestions

Serve these sandwiches with a side of fresh fruit or a crisp green salad for a balanced meal. For an extra kick, pair them with a tangy yogurt dip or some spicy salsa!

Pro Tip

Add a sprinkle of chili flakes, a few slices of tomato, or even a dash of sriracha for some heat. You can also make them open-faced for a lighter option!

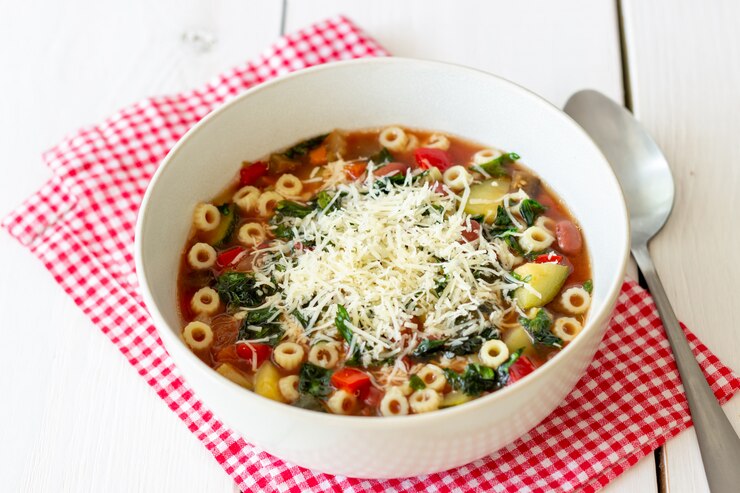
Hearty & Healthy: Winter Minestrone Soup!

Winter Minestrone Soup

Why You'll Love This Recipe

This Winter Minestrone Soup is the ultimate comfort food for the chilly season. Packed with hearty vegetables, beans, and wholesome ingredients, it’s both nutritious and satisfying. Perfect for warming up on a cold winter day or sharing with loved ones at the dinner table!

Ingredients

Here’s what you’ll need to create this delicious and healthy winter soup:

  • 2 tbsp olive oil
  • 1 onion, finely chopped
  • 2 garlic cloves, minced
  • 2 carrots, peeled and diced
  • 2 celery stalks, chopped
  • 1 zucchini, diced
  • 1 can (400g) diced tomatoes
  • 4 cups vegetable broth
  • 1 can (400g) cannellini beans, drained and rinsed
  • 1 cup chopped kale or spinach
  • 1/2 cup small pasta or quinoa (optional)
  • 1 tsp dried Italian herbs
  • Salt and pepper to taste
  • Fresh parsley and grated Parmesan for serving

Preparation Tips

Use seasonal vegetables for maximum flavor and nutrition. For a gluten-free option, substitute pasta with quinoa. Be sure to rinse the canned beans well to remove excess sodium.

Instructions

  1. Saute the aromatics: Heat olive oil in a large pot over medium heat. Add the onion, garlic, carrots, and celery. Cook until softened, about 5-7 minutes.
  2. Add the vegetables: Stir in the zucchini, diced tomatoes, and Italian herbs. Let it simmer for 5 minutes.
  3. Simmer the soup: Pour in the vegetable broth and bring to a boil. Reduce the heat, cover, and let it simmer for 15 minutes.
  4. Add the beans and greens: Stir in the cannellini beans, kale (or spinach), and pasta (or quinoa, if using). Cook until the pasta is tender and greens are wilted, about 10 minutes.
  5. Season and serve: Add salt and pepper to taste. Serve hot, garnished with fresh parsley and a sprinkle of Parmesan cheese.

Serving Suggestions

Pair this hearty minestrone with a slice of whole-grain bread or a warm garlic baguette. It also makes a perfect side dish for grilled chicken or roasted vegetables for a complete winter meal.

Pro Tip

Add a splash of lemon juice before serving to brighten the flavors. For extra protein, toss in cooked chicken or tofu. Leftovers taste even better the next day, so make a big batch!

Classic Gingerbread Cookies

Gingerbread Cookies

Why You'll Love This Recipe

These Classic Gingerbread Cookies are the ultimate holiday treat! Packed with warm spices and a touch of molasses, they are perfect for decorating with family or leaving out for Santa. Soft, chewy, and full of festive flavor, they’re guaranteed to spread holiday cheer.

Ingredients

Whip up a batch of gingerbread cookies with these festive ingredients:

  • 3 cups all-purpose flour
  • 2 tsp ground ginger
  • 1 tsp ground cinnamon
  • 1/4 tsp ground nutmeg
  • 1/4 tsp ground cloves
  • 1/2 tsp baking soda
  • 1/4 tsp salt
  • 3/4 cup unsalted butter (softened)
  • 3/4 cup packed brown sugar
  • 1/2 cup molasses
  • 1 large egg
  • 1 tsp vanilla extract

Preparation Tips

Chill the dough for at least 1 hour before rolling it out. This helps the cookies hold their shape while baking. Use festive cookie cutters to make holiday-themed designs!

Instructions

  1. Mix the dry ingredients: In a medium bowl, whisk together the flour, ginger, cinnamon, nutmeg, cloves, baking soda, and salt.
  2. Cream butter and sugar: In a large bowl, beat the butter and brown sugar until light and fluffy. Add the molasses, egg, and vanilla extract, mixing until smooth.
  3. Combine: Gradually mix the dry ingredients into the wet ingredients until a soft dough forms.
  4. Chill the dough: Wrap the dough in plastic wrap and refrigerate for at least 1 hour.
  5. Preheat the oven: Preheat your oven to 350°F (175°C). Line baking sheets with parchment paper.
  6. Roll and cut: Roll out the dough on a lightly floured surface to about 1/4-inch thickness. Use cookie cutters to cut out shapes and place them on the baking sheets.
  7. Bake: Bake for 8-10 minutes or until the edges are firm. Let the cookies cool completely on a wire rack.
  8. Decorate: Once cooled, decorate the cookies with royal icing, sprinkles, or candy.

Serving Suggestions

Serve these cookies with a glass of warm milk or hot cocoa. They also make a great gift when packaged in festive tins or cellophane bags!

Pro Tip

For perfectly even cookies, roll out the dough between two sheets of parchment paper. This also makes cleanup a breeze!

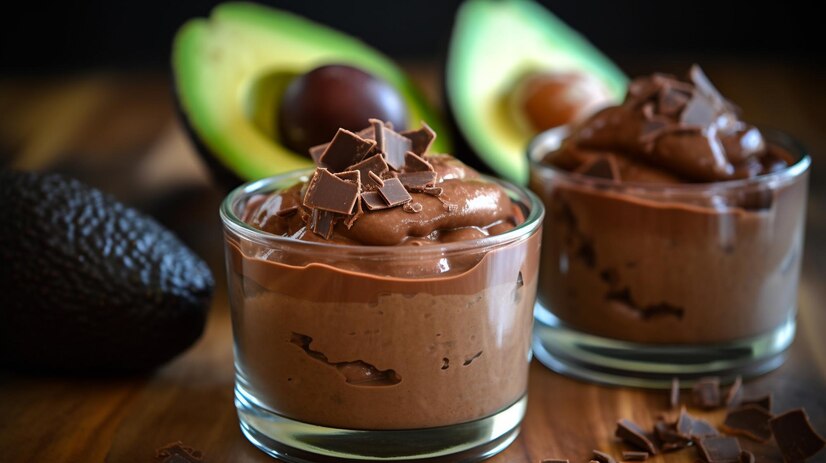
Healthy Indulgence: Avocado Chocolate Mousse!

Avocado Chocolate Mousse with Toppings

Why You'll Love This Recipe

This Avocado Chocolate Mousse is the perfect healthy indulgence for the holiday season! With rich, creamy avocado and antioxidant-packed dark chocolate, this dessert is both nutritious and decadent. It's a guilt-free treat that satisfies your sweet tooth while providing healthy fats, fiber, and vitamins. Whether you're looking for a festive dessert for family gatherings or a nutritious post-dinner treat, this mousse is sure to impress!

Ingredients

Here's what you'll need to make this creamy and indulgent avocado chocolate mousse:

  • 2 ripe avocados, peeled and pitted
  • 1/2 cup unsweetened cocoa powder
  • 1/4 cup maple syrup or honey (for natural sweetness)
  • 1/4 cup coconut milk or almond milk
  • 1 tsp vanilla extract
  • Pinch of sea salt
  • 2 oz dark chocolate (70% or higher), melted
  • Chopped nuts or berries for garnish (optional)
  • Shredded coconut or cacao nibs for topping (optional)

Preparation Tips

This mousse is simple to make, and you can adjust the sweetness to your preference with natural sweeteners like maple syrup or honey. For a dairy-free version, use coconut milk, and feel free to swap out the dark chocolate for dairy-free chocolate chips if needed. You can also experiment with adding a pinch of cinnamon or chili powder for a festive twist!

Instructions

  1. Prepare the avocado: In a blender or food processor, combine the ripe avocados, cocoa powder, maple syrup (or honey), coconut milk, vanilla extract, and a pinch of sea salt. Blend until smooth and creamy.
  2. Mix in the chocolate: Add the melted dark chocolate to the blender and pulse again until fully combined. Taste and adjust sweetness if necessary by adding more maple syrup or honey.
  3. Chill: Transfer the mousse to serving dishes or bowls and refrigerate for at least 1 hour to allow the flavors to meld and the mousse to firm up.
  4. Serve: Garnish the mousse with chopped nuts, fresh berries, or a sprinkle of shredded coconut for extra texture and a festive touch. Enjoy this healthy, creamy dessert!

Serving Suggestions

This avocado chocolate mousse pairs perfectly with a cup of warm herbal tea or a festive holiday cocktail. You can also serve it alongside a light fruit salad or a few slices of spiced gingerbread for a truly indulgent yet healthy holiday spread.

Pro Tip

For an extra dose of protein, add a tablespoon of almond butter or peanut butter into the mousse before blending. This will give the mousse an even creamier texture and a hint of nutty flavor that pairs perfectly with the chocolate.

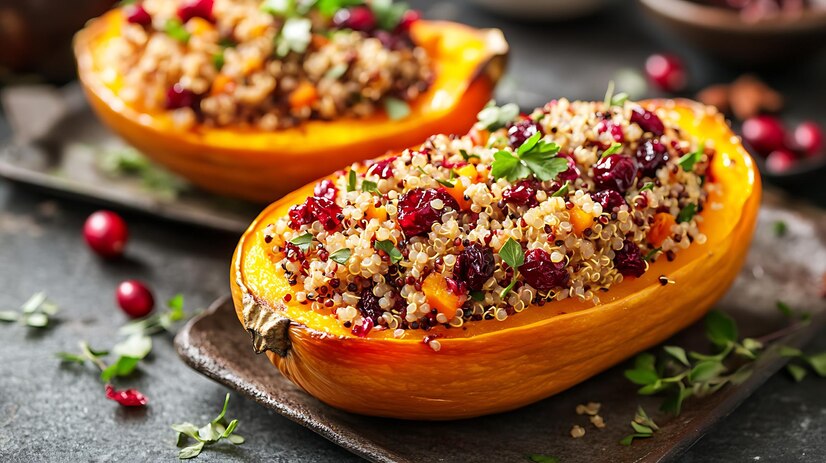
Quinoa-Stuffed Squash: A Festive and Nutritious Delight

Quinoa-Stuffed Squash with Herbs and Vegetables

Why You'll Love This Recipe

This Quinoa-Stuffed Squash is the perfect festive dish that combines vibrant flavors and wholesome ingredients. Packed with nutrient-dense quinoa, antioxidant-rich squash, and a variety of fresh vegetables, it’s a Healthy, Flavorful, and Festive meal that will impress your guests and nourish your body during the holiday season. Not only is this dish delicious, but it also makes for a beautifully colorful centerpiece at any winter gathering!

Ingredients

Here’s what you’ll need to make this healthy, festive quinoa-stuffed squash:

  • 2 medium-sized acorn squashes, halved and seeded
  • 1 cup quinoa (any variety)
  • 2 cups vegetable broth or water
  • 1/2 cup diced onions
  • 1/2 cup chopped bell peppers
  • 1/2 cup corn kernels (fresh or frozen)
  • 1/4 cup chopped fresh parsley or cilantro
  • 1 tsp ground cumin
  • 1/2 tsp ground paprika
  • Salt and pepper to taste
  • 1 tbsp olive oil
  • 1 tbsp maple syrup (optional, for a touch of sweetness)
  • Chopped nuts or seeds for garnish (optional)

Preparation Tips

This dish is both easy to make and full of flavor. You can swap out vegetables based on your preferences or what you have on hand. Try adding roasted carrots, mushrooms, or spinach for extra flavor. For a vegan version, omit any cheese or dairy, or substitute with plant-based alternatives.

Instructions

  1. Prepare the squash: Preheat your oven to 375°F (190°C). Place the squash halves on a baking sheet, drizzle with olive oil, and season with salt and pepper. Roast for 30-35 minutes, or until the squash is tender and easily pierced with a fork.
  2. Cook the quinoa: In a medium saucepan, bring the vegetable broth (or water) to a boil. Add the quinoa, reduce the heat, and simmer for 15 minutes, or until the quinoa is cooked and the liquid has been absorbed.
  3. Sauté the vegetables: While the quinoa cooks, heat olive oil in a pan over medium heat. Sauté the onions, bell peppers, and corn for 5-7 minutes, until softened. Season with cumin, paprika, salt, and pepper.
  4. Mix the stuffing: Once the quinoa is cooked, fluff it with a fork and transfer to a large bowl. Add the sautéed vegetables, fresh herbs, and maple syrup (if using). Stir to combine.
  5. Stuff the squash: Once the squash halves are roasted and tender, stuff them with the quinoa mixture, pressing it down gently to pack the filling in.
  6. Serve: Garnish the stuffed squash with chopped nuts or seeds for added texture. Serve warm and enjoy this nutritious, festive dish!

Serving Suggestions

This quinoa-stuffed squash pairs beautifully with a side of leafy greens or a light citrus salad. You can also serve it with a dollop of Greek yogurt or a drizzle of tahini for extra creaminess and flavor.

Pro Tip

For an added protein boost, sprinkle some feta or goat cheese over the quinoa stuffing before serving. You can also top with a few roasted pumpkin seeds for a crunchy finishing touch.

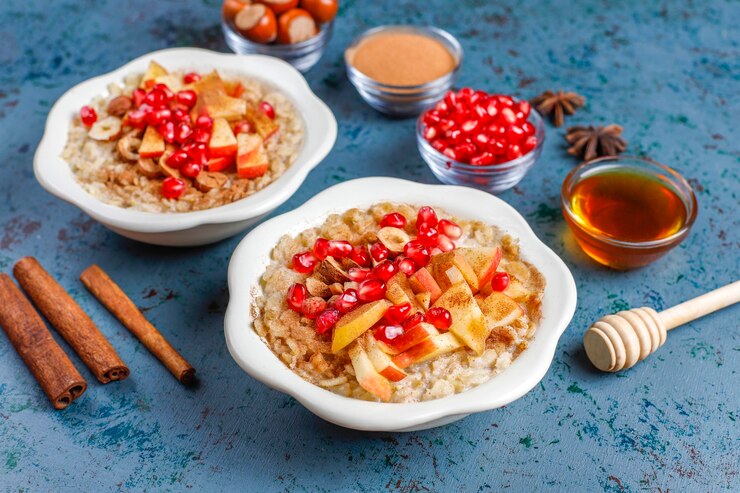
Healthy Holiday Winter Oatmeal Recipe You’ll Love!

Winter Oatmeal with Fruits and Nuts

Why You'll Love This Recipe

This Winter Oatmeal is the perfect warm and hearty breakfast for chilly mornings. Packed with nourishing ingredients like oats, fresh fruits, and healthy fats, it’s a Delicious and Nutritious way to start your day. A cozy, holiday-inspired twist makes this oatmeal an ideal dish for family gatherings and a comforting treat during the winter season!

Ingredients

Here’s what you’ll need to make this healthy, winter-inspired oatmeal:

  • 1 cup rolled oats
  • 2 cups unsweetened almond milk (or any milk of choice)
  • 1/2 cup chopped apples or pears
  • 1/4 cup dried cranberries or raisins
  • 1/4 cup chopped walnuts or almonds
  • 1 tsp ground cinnamon
  • 1/2 tsp ground ginger
  • 1 tbsp maple syrup or honey (optional, for sweetness)
  • Fresh fruit or additional nuts for topping

Preparation Tips

Use rolled oats for the best texture and heartiness. Feel free to swap in your favorite winter fruits like pears, pomegranates, or even figs. If you're looking to make this recipe vegan, stick with almond milk and skip the honey. Adjust the sweetness to your liking!

Instructions

  1. Cook the oats: In a medium saucepan, bring the almond milk to a simmer. Add the oats, cinnamon, and ginger, and cook over low heat, stirring occasionally for 5-7 minutes, until the oats are soft and the mixture thickens.
  2. Add fruits and nuts: Once the oats are cooked, stir in the chopped apples or pears, dried cranberries or raisins, and walnuts or almonds. Let it cook for an additional 2 minutes.
  3. Sweeten: Add the maple syrup or honey, and stir to combine. Adjust sweetness to your preference.
  4. Serve: Spoon the oatmeal into bowls and top with fresh fruit, extra nuts, or a sprinkle of cinnamon for an extra festive touch.

Serving Suggestions

This winter oatmeal pairs wonderfully with a cup of warm herbal tea or a side of yogurt for added protein. You can also serve it alongside a green smoothie for a well-rounded, nourishing breakfast.

Pro Tip

For extra richness, add a spoonful of almond or peanut butter before serving. You can also sprinkle some chia seeds or flaxseeds on top for an omega-3 boost.

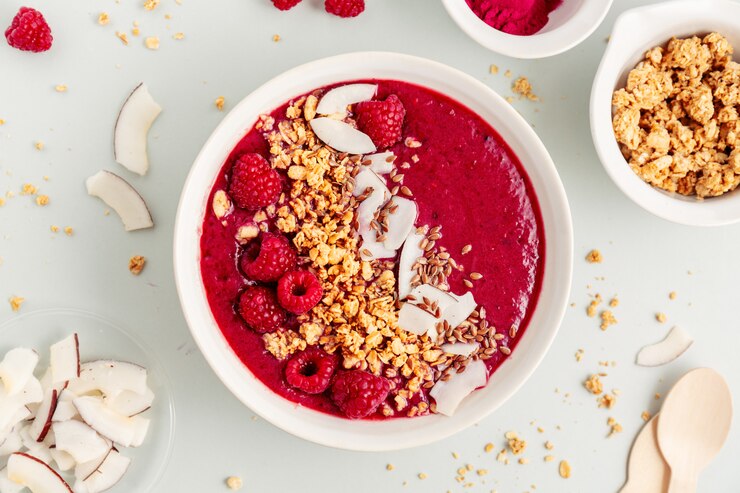
Holiday Smoothie Bowl: A Healthy Delight!

Holiday Smoothie Bowl with Fruits and Nuts

Why You'll Love This Recipe

This Holiday Smoothie Bowl is the perfect way to start your festive mornings. Bursting with vibrant fruits, creamy yogurt, and nutritious toppings, it’s a Delicious and Nutritious way to fuel your body while celebrating the season. With a holiday twist, this smoothie bowl is a fun and healthy treat for family gatherings or as a festive breakfast or snack!

Ingredients

Here’s what you’ll need to make this festive, healthy smoothie bowl:

  • 1 frozen banana
  • 1/2 cup frozen mango or pineapple
  • 1/2 cup frozen mixed berries (strawberries, blueberries, raspberries)
  • 1/2 cup Greek yogurt or dairy-free yogurt
  • 1/2 cup almond milk (or milk of choice)
  • 1 tbsp almond butter or peanut butter
  • 1 tbsp chia seeds or flaxseeds
  • 1 tsp ground cinnamon
  • 1 tbsp maple syrup or honey (optional, for sweetness)
  • Fresh fruit, granola, coconut flakes, and nuts for topping

Preparation Tips

For a thicker consistency, use more frozen fruit and less liquid. If you want a creamier texture, add a scoop of protein powder or your favorite nut butter. Feel free to adjust the toppings with your favorite fruits, granola, or a drizzle of nut butter for an extra boost!

Instructions

  1. Blend the smoothie base: In a blender, combine the frozen banana, mango or pineapple, mixed berries, yogurt, almond milk, almond butter, chia seeds, and cinnamon. Blend until smooth and creamy. If the mixture is too thick, add a splash of almond milk to reach your desired consistency.
  2. Sweeten: If desired, add maple syrup or honey and blend again to incorporate.
  3. Serve: Pour the smoothie into a bowl and top with fresh fruit, granola, coconut flakes, nuts, or anything else you love!

Serving Suggestions

This smoothie bowl pairs perfectly with a cup of herbal tea, a protein-packed side like boiled eggs, or a handful of nuts for added crunch. It’s also delicious as an afternoon pick-me-up or a post-workout treat!

Pro Tip

For an extra holiday touch, add a sprinkle of cinnamon, a few pomegranate seeds, or a drizzle of dark chocolate. You can also freeze the smoothie mixture in popsicle molds for a festive frozen treat!

A Holiday Classic: Roasted Turkey with Cranberry Sauce!

Roasted Turkey with Cranberry Sauce

Why You'll Love This Recipe

This Roasted Turkey with Cranberry Sauce is the epitome of a festive holiday meal. Juicy, flavorful turkey paired with a tangy-sweet cranberry sauce makes for a dish that’s both Healthy and Indulgent. It’s perfect for gatherings and special occasions, bringing a wholesome twist to your holiday table.

Ingredients

Here’s what you’ll need to make this healthy and festive roasted turkey with cranberry sauce:

  • 1 whole turkey (12-15 lbs)
  • 1/4 cup olive oil or melted butter
  • 2 tbsp fresh rosemary (chopped)
  • 2 tbsp fresh thyme (chopped)
  • Salt and black pepper to taste
  • 1 cup fresh or frozen cranberries
  • 1/4 cup orange juice
  • 2 tbsp honey or maple syrup
  • 1/2 tsp orange zest (optional)
  • Fresh parsley for garnish

Preparation Tips

Use fresh herbs for the best flavor and ensure the turkey is fully thawed before roasting. For a healthier twist, opt for natural sweeteners like honey or maple syrup in the cranberry sauce. Don’t forget to let the turkey rest before carving for the juiciest results.

Instructions

  1. Prepare the turkey: Preheat your oven to 325°F (165°C). Pat the turkey dry with paper towels and rub it generously with olive oil or melted butter. Season with salt, pepper, rosemary, and thyme.
  2. Roast: Place the turkey on a roasting rack in a large pan. Roast for 3-4 hours, or until the internal temperature reaches 165°F (74°C). Baste the turkey with pan drippings every 30 minutes for extra moisture and flavor.
  3. Make the cranberry sauce: In a small saucepan, combine cranberries, orange juice, honey or maple syrup, and orange zest (if using). Cook over medium heat until the cranberries soften and the mixture thickens.
  4. Rest the turkey: Remove the turkey from the oven and tent it with foil. Let it rest for 20-30 minutes before carving to allow the juices to redistribute.
  5. Serve: Arrange the carved turkey on a platter and garnish with fresh parsley. Serve alongside the cranberry sauce for a complete holiday feast.

Serving Suggestions

Pair this roasted turkey with classic holiday sides like roasted vegetables, mashed sweet potatoes, or a crisp green salad. The cranberry sauce also complements stuffing and rolls beautifully.

Pro Tip

For an extra festive touch, add a splash of red wine to the cranberry sauce for depth of flavor. If you prefer a smoother sauce, blend the cranberry mixture after cooking.

A Sweet Treat: Cinnamon Rolls with Cream Cheese Glaze Recipe!

Cinnamon Rolls

Why You'll Love This Recipe

These Cinnamon Rolls are the ultimate comfort food, perfect for cozy mornings or special occasions. Soft, fluffy, and swirled with cinnamon sugar, they’re topped with a rich cream cheese glaze that makes them absolutely irresistible. Treat your family and friends to this decadent homemade delight!

Ingredients

Gather these ingredients to bake the most delicious cinnamon rolls:

  • 3 1/4 cups all-purpose flour
  • 1/4 cup granulated sugar
  • 2 1/4 tsp instant yeast
  • 1/2 tsp salt
  • 1 cup warm milk (110°F/43°C)
  • 1/4 cup unsalted butter (melted)
  • 1 large egg
  • 1/3 cup packed brown sugar (for the filling)
  • 2 tbsp ground cinnamon
  • 1/4 cup unsalted butter (softened, for the filling)
  • 4 oz cream cheese (softened, for the glaze)
  • 1/4 cup unsalted butter (softened, for the glaze)
  • 1 cup powdered sugar (for the glaze)
  • 1 tsp vanilla extract (for the glaze)

Preparation Tips

Ensure the milk is warm but not too hot to activate the yeast properly. Let the dough rise in a warm place to achieve the softest rolls. Use softened cream cheese for a smooth glaze!

Instructions

  1. Prepare the dough: In a large bowl, mix flour, sugar, yeast, and salt. Add warm milk, melted butter, and egg. Knead the dough for about 8-10 minutes until smooth. Cover and let it rise until doubled in size.
  2. Make the filling: Combine brown sugar and cinnamon. Spread softened butter over the rolled-out dough and sprinkle the cinnamon-sugar mixture evenly.
  3. Roll and slice: Roll the dough tightly from one end to the other. Cut into 12 even rolls and place them in a greased baking dish.
  4. Second rise: Cover the rolls and let them rise again for 20-30 minutes.
  5. Bake: Preheat your oven to 350°F (175°C). Bake the rolls for 20-25 minutes or until golden brown.
  6. Prepare the glaze: Beat cream cheese, butter, powdered sugar, and vanilla extract until smooth and creamy.
  7. Glaze and serve: Spread the cream cheese glaze over the warm cinnamon rolls and enjoy!

Serving Suggestions

Serve these cinnamon rolls warm with a cup of coffee or hot chocolate for a perfect start to your day. They also make an excellent dessert or festive treat for gatherings.

Pro Tip

For an extra indulgent touch, add chopped pecans or raisins to the filling. You can also drizzle caramel sauce over the glaze for a gourmet finish!

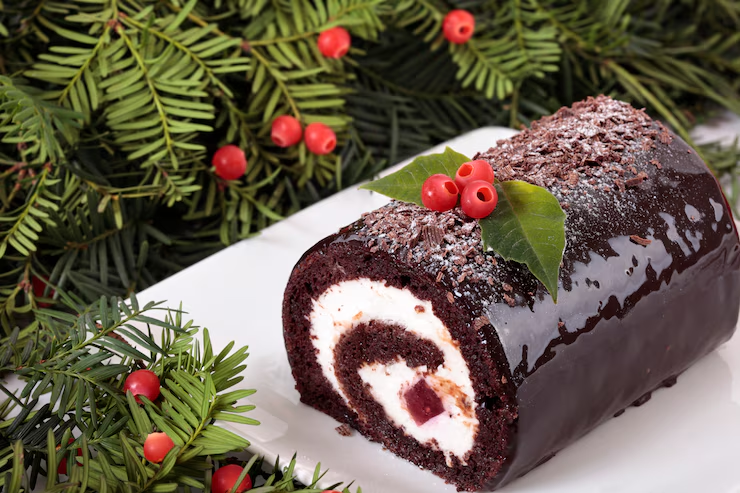
A Dessert to Impress: Yule Log Cake Recipe Inside!

Yule Log Cake

Why You'll Love This Recipe

This Yule Log Cake is the perfect holiday dessert that combines rich chocolate cake, creamy filling, and a beautiful presentation. Whether you're hosting a festive dinner, celebrating Christmas, or just craving a special treat, this classic dessert is sure to impress your guests and bring warmth to your holiday celebrations.

Ingredients

Gather these ingredients to make the perfect Yule Log Cake:

  • 1 cup all-purpose flour
  • 1/4 cup unsweetened cocoa powder
  • 1 tsp baking powder
  • 1/4 tsp salt
  • 4 large eggs
  • 1 cup granulated sugar
  • 1 tsp vanilla extract
  • 1 cup heavy cream
  • 1/4 cup powdered sugar
  • 2 tbsp unsweetened cocoa powder (for the frosting)
  • 1/2 cup butter (softened, for the frosting)
  • 1/4 cup powdered sugar (for the frosting)
  • 1 tsp vanilla extract (for the frosting)
  • Optional: chocolate shavings or powdered sugar for decoration

Preparation Tips

Make sure to roll the cake gently while it's still warm to avoid cracking. You can decorate the log with powdered sugar or chocolate shavings to give it a festive touch!

Instructions

  1. Prepare the cake: Preheat your oven to 350°F (175°C). Grease and line a jelly roll pan. Sift together the flour, cocoa powder, baking powder, and salt.
  2. Whisk the eggs and sugar: In a separate bowl, whisk together the eggs and sugar until light and fluffy. Add the vanilla extract.
  3. Combine the dry ingredients: Gradually fold in the sifted dry ingredients into the egg mixture. Pour the batter into the prepared pan and spread it evenly.
  4. Bake the cake: Bake the cake for about 12-15 minutes, or until a toothpick inserted into the center comes out clean. Remove from the oven and allow it to cool slightly.
  5. Roll the cake: While the cake is still warm, carefully roll it up in a clean kitchen towel, starting from the short side. Let it cool completely in the towel.
  6. Prepare the frosting: Whisk the heavy cream and powdered sugar together until stiff peaks form. In another bowl, beat the butter, cocoa powder, powdered sugar, and vanilla until smooth.
  7. Unroll the cake and frost: Once the cake is cool, unroll it and spread a layer of whipped cream over the surface. Roll it back up without the towel.
  8. Frost the cake: Cover the entire cake with the chocolate buttercream frosting, creating a "bark" effect with a spatula or fork.
  9. Decorate and serve: Optionally, garnish with chocolate shavings or a dusting of powdered sugar to resemble snow. Serve chilled for the best texture.

Serving Suggestions

Serve your Yule Log Cake with a cup of hot cocoa or coffee for a perfect holiday treat. It's also great with a side of vanilla ice cream for extra indulgence.

Pro Tip

For the best presentation, use a fork to create a bark-like texture on the frosting, and add some festive decorations like holly leaves or chocolate snowflakes!

Philly Cheesesteak: A Bite of Perfection

Philly Cheesesteak

Why You'll Love This Recipe

This Philly Cheesesteak recipe is the ultimate comfort food that combines juicy steak, melted cheese, and a soft hoagie roll. Whether you're hosting a party, enjoying a casual family dinner, or craving a delicious snack, this iconic sandwich is a crowd-pleaser that brings the heart of Philadelphia to your kitchen.

Ingredients

Gather these ingredients to make the perfect Philly Cheesesteak:

  • 1 lb thinly sliced rib-eye steak
  • 4 hoagie rolls
  • 1 large onion, thinly sliced
  • 1 green bell pepper, thinly sliced (optional)
  • 2 cups provolone cheese, sliced
  • 2 tbsp olive oil
  • 1 tbsp butter
  • Salt and pepper to taste
  • Optional: hot sauce or sautéed mushrooms for added flavor

Preparation Tips

Make sure to slice the steak thinly to get the perfect texture. For extra flavor, you can add sautéed mushrooms or hot sauce to spice things up!

Instructions

  1. Sauté the vegetables: In a pan, heat the olive oil and sauté the onions (and bell peppers, if using) over medium heat until tender and caramelized.
  2. Cook the steak: In the same pan, melt the butter and add the sliced steak. Season with salt and pepper and cook until just browned and tender.
  3. Assemble the sandwich: Split the hoagie rolls and fill them with the cooked steak and sautéed onions (and peppers). Layer the provolone cheese on top.
  4. Melt the cheese: Place the sandwiches under the broiler for a minute or until the cheese is melted and bubbly.
  5. Serve: Serve your Philly Cheesesteak hot, and optionally drizzle with hot sauce or top with sautéed mushrooms.

Serving Suggestions

Serve these Philly Cheesesteaks with crispy fries and a cold soda for the ultimate experience. You can also pair it with a side of coleslaw for a delightful crunch.

Pro Tip

For the perfect Philly Cheesesteak, use freshly baked hoagie rolls and ensure the steak is thinly sliced so it cooks quickly and evenly.

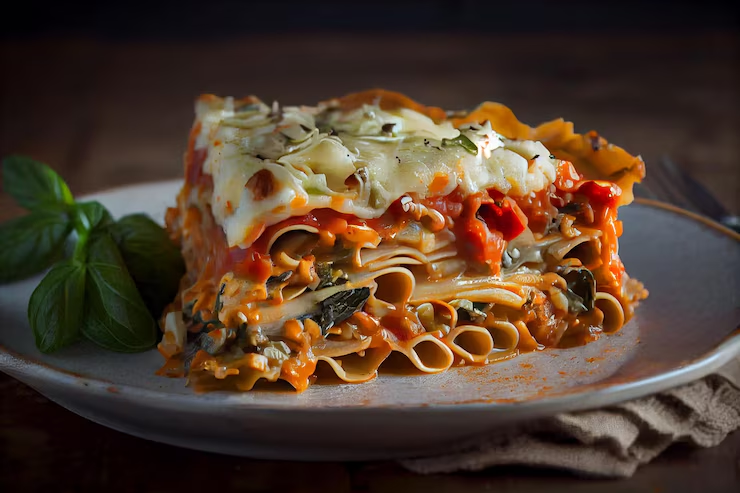
Holiday Special: Vegetable Lasagna

Vegetable Lasagna

Why You'll Love This Recipe

This Holiday Special Vegetable Lasagna is the perfect centerpiece for your festive dinner! Layered with creamy ricotta, hearty vegetables, and a zesty tomato sauce, this dish is not only delicious but also nutritious. Whether you're serving it for a holiday gathering or enjoying a cozy family meal, it’s guaranteed to be a crowd-pleaser.

Ingredients

Gather these ingredients to prepare a mouthwatering Holiday Vegetable Lasagna:

  • 9 lasagna noodles, cooked
  • 2 cups marinara sauce
  • 1 cup ricotta cheese
  • 2 cups shredded mozzarella cheese
  • 1/2 cup grated Parmesan cheese
  • 2 cups diced mixed vegetables (zucchini, bell peppers, spinach, carrots)
  • 2 cloves garlic, minced
  • 1 tsp dried Italian herbs
  • Salt and pepper to taste

Preparation Tips

Ensure the layers are evenly spread for a well-balanced lasagna. For added flavor, roast the vegetables before layering.

Instructions

  1. Prepare the vegetables: In a skillet, sauté the diced vegetables with garlic, salt, pepper, and Italian herbs until tender.
  2. Preheat the oven: Preheat your oven to 375°F (190°C).
  3. Assemble the lasagna: Spread a thin layer of marinara sauce on the bottom of a baking dish. Layer cooked lasagna noodles, ricotta cheese, sautéed vegetables, marinara sauce, and mozzarella cheese. Repeat the layers until the ingredients are used up, finishing with a layer of marinara and mozzarella cheese on top.
  4. Bake: Cover the dish with aluminum foil and bake for 25 minutes. Remove the foil and bake for an additional 10-15 minutes until the cheese is bubbly and golden.
  5. Cool: Let the lasagna cool for 10 minutes before slicing and serving.

Serving Suggestions

Serve this Holiday Vegetable Lasagna with a side of garlic bread and a crisp green salad for a complete meal. For a festive touch, pair it with a glass of sparkling cider or wine.

Pro Tip

This lasagna can be made ahead of time! Assemble the layers and refrigerate it for up to 24 hours before baking. It’s a stress-free way to prepare for the holidays!

Hot Chocolate Lava Cake: A Winter Delight

Why You'll Love This Recipe

This Hot Chocolate Lava Cake is the ultimate winter dessert! With its gooey, molten chocolate center and perfectly baked exterior, it's the indulgent treat everyone will rave about. Whether you're celebrating a special occasion or simply craving a rich, chocolaty dessert, this cake is sure to warm your heart and satisfy your sweet tooth.

Ingredients

Gather these ingredients to make the perfect Hot Chocolate Lava Cake:

  • 1/2 cup unsalted butter
  • 6 oz semi-sweet chocolate, chopped
  • 1 cup powdered sugar
  • 2 large eggs
  • 2 egg yolks
  • 1 tsp vanilla extract
  • 1/4 cup all-purpose flour
  • Pinch of salt
  • Whipped cream or vanilla ice cream, for serving

Preparation Tips

Ensure the molten center is perfectly gooey by not overbaking the cakes. If you're unsure, test with a toothpick—leave it slightly moist for that lava effect.

Instructions

  1. Preheat the oven: Preheat your oven to 425°F (220°C). Grease and flour four ramekins or use cooking spray.
  2. Prepare the chocolate: In a microwave-safe bowl, melt the butter and chocolate together in 30-second intervals, stirring until smooth.
  3. Mix the batter: Whisk the powdered sugar, eggs, egg yolks, and vanilla into the melted chocolate mixture. Stir in the flour and salt until fully combined.
  4. Fill the ramekins: Divide the batter evenly between the prepared ramekins, filling them about three-quarters full.
  5. Bake: Bake the cakes for 12-14 minutes or until the edges are set, but the centers are soft. Do not overbake to keep the molten center.
  6. Cool: Let the cakes cool for 1-2 minutes before carefully inverting them onto plates.
  7. Serve: Serve the lava cakes warm, topped with whipped cream or vanilla ice cream for extra indulgence.

Serving Suggestions

These Hot Chocolate Lava Cakes are perfect for serving with a drizzle of caramel sauce or a dusting of powdered sugar. Pair with a hot drink like cocoa or coffee for the ultimate winter treat!

Pro Tip

To make these cakes ahead of time, prepare the batter, fill the ramekins, and refrigerate until you're ready to bake. Just increase the baking time by a couple of minutes when you're ready to serve!

The Perfect Blend of Eggnog and Cheesecake Awaits

Why You'll Love This Recipe

This Eggnog Cheesecake is the ultimate dessert for the season! With its creamy, rich texture and a hint of spice from the eggnog, this cheesecake is the perfect blend of holiday flavors. The buttery graham cracker crust pairs perfectly with the indulgent filling, making it an unforgettable treat for any occasion.

Ingredients

Whip up this delightful Eggnog Cheesecake with these ingredients:

  • 1 1/2 cups graham cracker crumbs
  • 1/4 cup sugar
  • 1/2 cup unsalted butter, melted
  • 3 (8 oz) packages cream cheese, softened
  • 1 cup sugar
  • 1/2 cup eggnog
  • 1 tsp vanilla extract
  • 1/2 tsp ground cinnamon
  • 1/4 tsp ground nutmeg
  • 3 large eggs
  • Whipped cream for topping

Preparation Tips

Be sure to let the cream cheese soften to room temperature for a smooth, lump-free filling. Also, chill the cheesecake for at least 4 hours to allow the flavors to meld and set properly.

Instructions

  1. Preheat the oven: Preheat your oven to 325°F (165°C).
  2. Prepare the crust: In a bowl, combine the graham cracker crumbs, sugar, and melted butter. Press the mixture into the bottom of a 9-inch springform pan. Bake for 10 minutes, then remove from the oven and set aside.
  3. Prepare the filling: In a large mixing bowl, beat the cream cheese and sugar until smooth. Add the eggnog, vanilla, cinnamon, and nutmeg, and mix until well combined. Beat in the eggs one at a time, mixing just until incorporated.
  4. Fill the crust: Pour the cheesecake filling over the cooled crust in the springform pan.
  5. Bake: Bake the cheesecake at 325°F (165°C) for 55-60 minutes, or until the center is set but still slightly jiggly. Turn off the oven and let the cheesecake cool in the oven for 1 hour.
  6. Chill: After the cheesecake has cooled, refrigerate it for at least 4 hours or overnight for best results.
  7. Top with whipped cream: Before serving, top with a dollop of whipped cream and a sprinkle of cinnamon or nutmeg for a festive touch.

Serving Suggestions

This Eggnog Cheesecake is perfect on its own or served with a cup of warm spiced cider. Add a few candied pecans or a drizzle of caramel sauce for an extra touch of indulgence!

Pro Tip

For a smoother, creamier texture, beat the cheesecake filling for a few extra minutes. You can also add a tablespoon of flour to the filling mixture to help it set better.

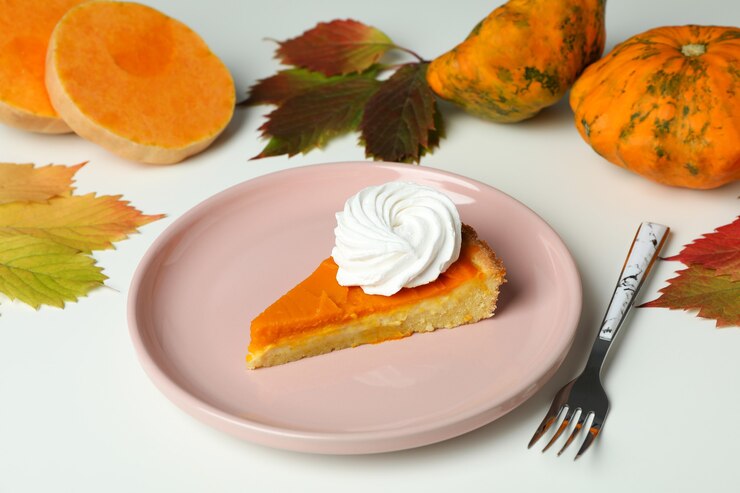
Pumpkin Pie with Whipped Cream

Why You'll Love This Recipe

This Pumpkin Pie with Whipped Cream is the quintessential holiday dessert! With its smooth and creamy filling, warm spices, and a dollop of fluffy whipped cream, it's the perfect sweet treat for your festive table. Whether you're hosting or attending a gathering, this pie is sure to impress.

Ingredients

Prepare a classic pumpkin pie with these simple ingredients:

  • 1 pre-made or homemade pie crust
  • 1 3/4 cups pumpkin puree (canned or fresh)
  • 1 cup heavy cream
  • 1/2 cup whole milk
  • 3/4 cup packed brown sugar
  • 2 large eggs
  • 1 tsp vanilla extract
  • 1 tsp ground cinnamon
  • 1/2 tsp ground ginger
  • 1/4 tsp ground nutmeg
  • 1/4 tsp ground cloves
  • 1/4 tsp salt
  • Whipped cream for topping

Preparation Tips

Pre-bake your pie crust (blind bake) for a flaky base that doesn't get soggy. Allow the filling to rest after mixing to ensure even flavor distribution.

Instructions

  1. Preheat the oven: Preheat your oven to 425°F (220°C).
  2. Prepare the crust: If using a homemade crust, roll it out and fit it into a 9-inch pie pan. Crimp the edges and chill for 15 minutes.
  3. Mix the filling: In a large bowl, whisk together the pumpkin puree, heavy cream, milk, brown sugar, eggs, vanilla extract, and spices until smooth.
  4. Fill the crust: Pour the pumpkin mixture into the prepared crust.
  5. Bake: Bake at 425°F (220°C) for 15 minutes. Reduce the oven temperature to 350°F (175°C) and bake for an additional 40-50 minutes or until the filling is set and a knife inserted into the center comes out clean.
  6. Cool: Allow the pie to cool completely on a wire rack before serving.
  7. Top with whipped cream: Just before serving, dollop whipped cream on top of the pie or pipe it around the edges for a decorative touch.

Serving Suggestions

Serve this pumpkin pie slightly chilled or at room temperature. Pair it with a scoop of vanilla ice cream or a sprinkle of cinnamon for an extra festive touch!

Pro Tip

For a smoother texture, strain the filling through a fine-mesh sieve before pouring it into the crust. This step removes any lumps and ensures a silky finish.

Holiday Special: Baked Lemon Herb Salmon

Baked Lemon Herb Salmon

Why You'll Love This Recipe

This Baked Lemon Herb Salmon is the perfect holiday dish, combining zesty citrus with fragrant herbs. It's tender, flaky, and packed with omega-3s, making it a healthy yet delicious choice for your festive feast.

Ingredients

Prepare this flavorful salmon with these simple ingredients:

  • 4 salmon fillets (6 oz each)
  • 2 lemons (sliced and juiced)
  • 3 tbsp olive oil
  • 2 cloves garlic (minced)
  • 1 tbsp fresh parsley (chopped)
  • 1 tsp dried thyme
  • 1 tsp dried dill
  • Salt and pepper to taste

Preparation Tips

For the best flavor, marinate the salmon in the lemon herb mixture for 15-20 minutes before baking. Use parchment paper on your baking sheet for easy cleanup.

Instructions

  1. Preheat the oven: Preheat your oven to 375°F (190°C). Line a baking sheet with parchment paper or lightly grease it.
  2. Prepare the marinade: In a small bowl, mix olive oil, lemon juice, garlic, parsley, thyme, dill, salt, and pepper. Whisk until combined.
  3. Marinate the salmon: Place the salmon fillets on the baking sheet. Drizzle the marinade over the fillets, ensuring they are evenly coated. Top with lemon slices.
  4. Bake: Bake for 15-18 minutes, or until the salmon is cooked through and flakes easily with a fork.
  5. Serve: Garnish with additional fresh herbs and a squeeze of lemon juice. Serve warm with your favorite sides.

Serving Suggestions

Pair this salmon with roasted vegetables, wild rice, or a fresh green salad for a complete holiday meal. A glass of crisp white wine complements the flavors beautifully.

Pro Tip

For a golden, slightly crisp finish, broil the salmon for the last 2 minutes of baking. Keep an eye on it to prevent overcooking.

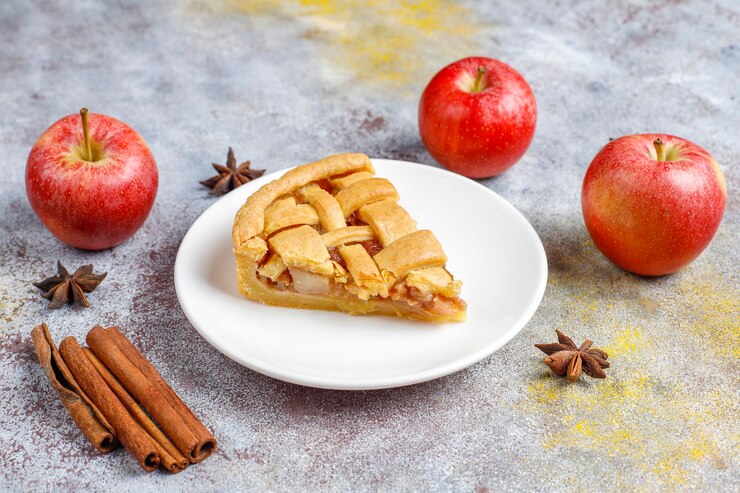
Holiday Delight: Spiced Apple Pie

Spiced Apple Pie

Why You'll Love This Recipe

This spiced apple pie is the ultimate holiday treat, packed with warm, aromatic spices and tender apples. Perfect for gatherings or a cozy family dessert, this pie will fill your home with the delicious scents of cinnamon, nutmeg, and cloves.

Ingredients

Make this holiday favorite with these simple ingredients:

  • 6 cups peeled and sliced apples (Granny Smith or Honeycrisp work best)
  • 1/2 cup granulated sugar
  • 1/4 cup brown sugar, packed
  • 1 tsp ground cinnamon
  • 1/2 tsp ground nutmeg
  • 1/4 tsp ground cloves
  • 1 tbsp lemon juice
  • 2 tbsp all-purpose flour (or cornstarch for a gluten-free option)
  • 1 tbsp butter, cut into small pieces
  • 1 package of pre-made pie crusts (or homemade if preferred)

Preparation Tips

To prevent a soggy bottom crust, sprinkle a little flour on the bottom of the pie crust before adding the filling. For extra flavor, add a pinch of sea salt to balance the sweetness.

Instructions

  1. Preheat the oven: Preheat your oven to 375°F (190°C). Roll out your pie crust and place it into a 9-inch pie dish.
  2. Prepare the filling: In a large bowl, combine the sliced apples, granulated sugar, brown sugar, cinnamon, nutmeg, cloves, lemon juice, and flour. Toss to coat the apples evenly.
  3. Fill the pie crust: Pour the apple mixture into the prepared pie crust, spreading it out evenly. Dot the filling with small pieces of butter.
  4. Top the pie: Cover the pie with the second pie crust, crimping the edges to seal. Cut a few small slits in the top crust to allow steam to escape.
  5. Bake: Place the pie on a baking sheet to catch any drips and bake for 45-50 minutes, or until the crust is golden brown and the filling is bubbly.
  6. Cool and serve: Let the pie cool for at least 30 minutes before serving. This allows the filling to set. Serve warm with a scoop of vanilla ice cream or a dollop of whipped cream.

Serving Suggestions

This spiced apple pie pairs perfectly with a cup of hot cider or a rich cup of coffee. For a festive twist, add a drizzle of caramel sauce or sprinkle with chopped pecans before serving.

Pro Tip

To get a perfectly golden crust, brush the top of the pie with an egg wash before baking. It adds a beautiful finish and helps seal in the flavor.

Thanksgiving Dessert: Dark Chocolate-Dipped Pears

Dark Chocolate-Dipped Pears

Why You'll Love This Recipe

Treat your Thanksgiving guests to a guilt-free indulgence with Dark Chocolate-Dipped Pears! These juicy pears, dipped in rich dark chocolate and topped with a sprinkle of almond dust, offer a delightful mix of natural sweetness, crunch, and elegance.

Ingredients

Gather these simple ingredients to create a show-stopping dessert:

  • 4 ripe pears, washed and dried
  • 1 cup dark chocolate chips
  • 1 tbsp coconut oil
  • 1/4 cup almonds, finely chopped
  • Optional: a pinch of sea salt or shredded coconut for garnish

Preparation Tips

Use firm, ripe pears for the best results. To make dipping easier, insert skewers or toothpicks into the top of the pears.

Instructions

  1. Prepare the chocolate: In a microwave-safe bowl, combine the dark chocolate chips and coconut oil. Heat in 30-second intervals, stirring in between, until smooth and glossy.
  2. Dip the pears: Holding each pear by the stem or skewer, dip it into the melted chocolate, swirling to coat evenly. Let any excess chocolate drip off.
  3. Add the toppings: Sprinkle the chopped almonds over the chocolate-coated pears before the chocolate hardens. Add a pinch of sea salt or other garnish, if desired.
  4. Set the pears: Place the pears on a parchment-lined baking sheet and refrigerate for 15–20 minutes, or until the chocolate is fully set.
  5. Serve: Arrange the pears on a platter and serve chilled or at room temperature. Enjoy their sweet, nutty flavors!

Serving Suggestions

Pair these elegant pears with a cup of hot cocoa, coffee, or a sparkling holiday cocktail for a perfect Thanksgiving treat. They also make a stunning centerpiece for your dessert table!

Pro Tip

For an extra festive touch, drizzle the pears with white chocolate or sprinkle edible gold dust over the almond topping.

Healthy Avocado Toast: A Delicious and Nutritious Breakfast!

Healthy Avocado Toast

Why You'll Love This Recipe

Avocado toast is the ultimate combination of creamy, crunchy, and flavorful. Packed with healthy fats, fiber, and protein, it’s a quick and satisfying way to start your day!

Ingredients

You'll only need a handful of fresh ingredients to whip up this nutritious breakfast:

  • 2 slices of whole-grain bread, toasted
  • 1 ripe avocado
  • 1 tsp lemon or lime juice
  • 1/4 tsp salt
  • 1/8 tsp black pepper
  • Optional toppings: cherry tomatoes, arugula, poached egg, chili flakes, or everything bagel seasoning

Preparation Tips

Choose a perfectly ripe avocado for the creamiest texture. Look for an avocado that yields slightly when gently squeezed. To prevent browning, mix the mashed avocado with lemon or lime juice as soon as possible.

Instructions

  1. Prepare the avocado: Slice the avocado in half, remove the pit, and scoop the flesh into a bowl. Mash with a fork until creamy but slightly chunky.
  2. Season: Mix the mashed avocado with lemon or lime juice, salt, and black pepper to taste.
  3. Toast the bread: Toast the whole-grain bread slices to your desired level of crispiness.
  4. Assemble: Spread the seasoned avocado evenly over each slice of toast.
  5. Add toppings: Customize your avocado toast with your favorite toppings. Try halved cherry tomatoes for a burst of sweetness, a poached egg for added protein, or a sprinkle of chili flakes for a spicy kick.
  6. Serve: Enjoy immediately while the toast is warm and the avocado is fresh.

Serving Suggestions

Pair your avocado toast with a cup of fresh-squeezed juice or a latte for a well-rounded breakfast. It's also a great snack or light lunch option when paired with a side salad.

Pro Tip

To take your avocado toast to the next level, drizzle a bit of balsamic glaze or olive oil on top. You can also experiment with toppings like smoked salmon or feta cheese for an elevated twist.

Pumpkin and Lentil Soup: A Warm, Hearty, and Nutritious Fall Favorite!

Pumpkin and Lentil Soup

Why You'll Love This Recipe

This pumpkin and lentil soup is a comforting bowl of goodness. Packed with warm spices, hearty lentils, and creamy pumpkin, it’s the perfect meal to enjoy on a chilly fall day.

Ingredients

Simple, wholesome ingredients come together to create this flavorful soup:

  • 2 cups pumpkin puree (fresh or canned)
  • 1 cup red lentils, rinsed
  • 1 tbsp olive oil
  • 1 medium onion, finely chopped
  • 3 cloves garlic, minced
  • 4 cups vegetable broth
  • 1 cup coconut milk (optional for creaminess)
  • 1 tsp ground cumin
  • 1/2 tsp smoked paprika
  • 1/4 tsp ground cinnamon
  • Salt and pepper, to taste
  • Optional: chopped parsley and pumpkin seeds for garnish

Preparation Tips

Rinse the lentils thoroughly before cooking to remove excess starch. If using fresh pumpkin, roast it beforehand for a richer flavor.

Instructions

  1. Sauté the aromatics: Heat olive oil in a large pot over medium heat. Add the onion and garlic, and sauté until softened and fragrant.
  2. Add spices: Stir in the cumin, smoked paprika, and cinnamon, cooking for about 1 minute to toast the spices.
  3. Add pumpkin and lentils: Stir in the pumpkin puree and rinsed lentils, mixing well to combine.
  4. Add broth: Pour in the vegetable broth, stirring to incorporate all ingredients. Bring to a boil, then reduce to a simmer.
  5. Simmer: Cover and cook for 20-25 minutes, stirring occasionally, until the lentils are tender.
  6. Blend (optional): For a smoother texture, use an immersion blender to puree the soup to your desired consistency. Alternatively, leave it chunky for a rustic feel.
  7. Finish with coconut milk: If desired, stir in coconut milk for added creaminess. Adjust seasoning with salt and pepper.
  8. Serve: Ladle the soup into bowls and garnish with chopped parsley and pumpkin seeds. Enjoy warm!

Serving Suggestions

Serve this soup with crusty bread, a side of mixed greens, or top it with a dollop of yogurt for extra richness. It’s also great as a starter for a fall-themed dinner.

Pro Tip

Make a double batch and freeze individual portions for a quick, healthy meal anytime during the fall season.

Gluten-Free Cornbread Muffins: A Tasty and Nutritious Treat!

Gluten-Free Cornbread Muffins

Why You'll Love This Recipe

These gluten-free cornbread muffins are the perfect blend of savory and sweet. Moist, fluffy, and made with wholesome ingredients, they’re great for any meal or as a satisfying snack.

Ingredients

Whip up these delightful muffins with these simple ingredients:

  • 1 cup gluten-free cornmeal
  • 1 cup gluten-free all-purpose flour
  • 1/4 cup sugar (optional, for a sweeter muffin)
  • 1 tbsp baking powder
  • 1/2 tsp salt
  • 1 cup milk (or plant-based alternative)
  • 1/4 cup melted butter or coconut oil
  • 2 large eggs
  • Optional: 1/2 cup shredded cheese or corn kernels for added flavor

Preparation Tips

To avoid dense muffins, mix the batter just until combined. Preheating the oven ensures the muffins rise evenly.

Instructions

  1. Preheat the oven: Set your oven to 375°F (190°C). Line a muffin tin with paper liners or lightly grease it.
  2. Mix dry ingredients: In a large bowl, whisk together the cornmeal, flour, sugar, baking powder, and salt.
  3. Combine wet ingredients: In a separate bowl, whisk the milk, melted butter, and eggs until smooth.
  4. Mix the batter: Pour the wet ingredients into the dry ingredients. Stir gently until just combined. Fold in optional add-ins if desired.
  5. Fill the muffin tin: Divide the batter evenly among the prepared muffin cups, filling each about 3/4 full.
  6. Bake: Place the muffins in the oven and bake for 15-20 minutes, or until a toothpick inserted into the center comes out clean.
  7. Cool and serve: Allow the muffins to cool for a few minutes in the pan, then transfer them to a wire rack. Serve warm or at room temperature.

Serving Suggestions

These muffins pair wonderfully with soups, chili, or barbecue. Spread with butter or honey for a quick and delicious snack.

Pro Tip

For a savory twist, mix in chopped jalapeños, cooked bacon bits, or fresh herbs before baking.

Cranberry-Orange Relish with Honey: A Sweet and Tangy Delight!

Cranberry-Orange Relish with Honey

Why You'll Love This Recipe

This cranberry-orange relish with honey offers a burst of sweet and tangy flavors that perfectly complement holiday feasts. Fresh, vibrant, and naturally sweetened, it’s a versatile dish for any occasion.

Ingredients

You'll need just a few fresh ingredients for this simple yet flavorful relish:

  • 12 oz fresh cranberries
  • 1 medium orange (zested and juiced)
  • 1/4 cup honey (adjust to taste)
  • 1/4 cup chopped pecans (optional, for added crunch)
  • Pinch of cinnamon (optional, for warmth)

Preparation Tips

Use a food processor for a quick, even chop of the cranberries and orange. For a smoother relish, pulse longer; for chunkier relish, pulse less.

Instructions

  1. Prep the cranberries: Rinse the cranberries under cold water and discard any that are bruised or damaged.
  2. Process: In a food processor, combine the cranberries, orange zest, and orange juice. Pulse until coarsely chopped.
  3. Add honey: Stir in the honey, adjusting the sweetness to your taste. Add a pinch of cinnamon for a warm, festive touch, if desired.
  4. Fold in pecans: If using, gently fold in the chopped pecans for added texture.
  5. Chill: Transfer the relish to a serving dish, cover, and refrigerate for at least 1 hour to allow the flavors to meld.
  6. Serve: Serve chilled or at room temperature as a side dish or topping.

Serving Suggestions

This relish pairs beautifully with roasted turkey, ham, or chicken. It’s also a fantastic topping for yogurt, oatmeal, or even desserts like cheesecake.

Pro Tip

For an extra zing, add a splash of fresh lime juice or a sprinkle of finely chopped fresh mint just before serving.

Healthy Quinoa Salad: A Refreshing and Nutritious Meal!

Healthy Quinoa Salad

Why You'll Love This Recipe

Packed with protein-rich quinoa, fresh vegetables, and a zesty dressing, this quinoa salad is a refreshing and nutritious option for any meal. It’s perfect for meal prep, picnics, or as a wholesome side dish.

Ingredients

Here's everything you need to make this vibrant salad:

  • 1 cup quinoa, rinsed
  • 2 cups water or vegetable broth
  • 1 cup cherry tomatoes, halved
  • 1 cup cucumber, diced
  • 1/2 red onion, finely chopped
  • 1/4 cup fresh parsley, chopped
  • 1/4 cup feta cheese (optional)
  • 3 tbsp olive oil
  • 2 tbsp lemon juice
  • 1 clove garlic, minced
  • Salt and pepper, to taste

Preparation Tips

For the fluffiest quinoa, cook it in vegetable broth for extra flavor, and let it cool completely before assembling the salad to prevent wilting the fresh vegetables.

Instructions

  1. Cook the quinoa: In a medium saucepan, combine quinoa and water (or broth). Bring to a boil, then reduce to a simmer, cover, and cook for 15 minutes or until the water is absorbed. Fluff with a fork and let cool.
  2. Prepare the dressing: In a small bowl, whisk together olive oil, lemon juice, garlic, salt, and pepper.
  3. Assemble the salad: In a large bowl, combine cooked quinoa, cherry tomatoes, cucumber, red onion, and parsley. Toss gently to mix.
  4. Add the dressing: Drizzle the dressing over the salad and toss to coat evenly. Adjust seasoning to taste.
  5. Garnish: Sprinkle with feta cheese, if using, and serve immediately or refrigerate for up to 3 days.

Serving Suggestions

Enjoy this quinoa salad on its own as a light meal, or pair it with grilled chicken, fish, or a hearty soup for a complete, satisfying meal.

Pro Tip

For added flavor and texture, toss in some toasted nuts or seeds, such as almonds or sunflower seeds.

Your Health, Our Priority: Essential Tips for Wellness and Well-being

Your Health, Our Priority

Why Your Health Should Be Your Top Priority

Health is the foundation of a fulfilling life. By making small but impactful changes to your daily routine, you can enhance your physical and mental well-being. Your health deserves to be your top priority, and investing in healthy habits today will yield long-term benefits.

Top Tips for Prioritizing Your Health

1. Regular Exercise for Physical and Mental Health

Physical activity isn't just great for your body; it’s beneficial for your mind as well. Regular exercise reduces stress, boosts mood, and improves overall physical health. Aim for at least 30 minutes of moderate exercise most days of the week.

2. Nourish Your Body with a Balanced Diet

Eating a well-balanced diet is essential for maintaining good health. Focus on whole foods, including plenty of fruits, vegetables, lean proteins, and healthy fats. Avoid excessive processed foods and refined sugars to support your body's natural processes.

3. Get Enough Sleep

Sleep is critical for overall health. Adults should aim for 7-9 hours of quality sleep each night. Adequate rest improves cognitive function, strengthens the immune system, and reduces the risk of chronic conditions.

4. Stay Hydrated

Proper hydration is essential for bodily functions like digestion, circulation, and temperature regulation. Aim to drink at least 8 glasses of water a day, and adjust depending on your activity level or climate conditions.

5. Practice Stress Management Techniques

Stress is inevitable, but how you manage it can have a significant impact on your health. Incorporate mindfulness, meditation, or relaxation techniques into your routine to manage stress and enhance your overall well-being.

The Importance of Preventive Care

Preventive care plays a vital role in maintaining your health. Regular check-ups, screenings, and vaccinations can catch potential health issues early and ensure you're on the right track. Don’t wait for symptoms to arise—be proactive about your health!

How to Make Your Health a Priority Every Day

Making your health a priority doesn't require drastic changes. By committing to small, consistent actions like staying active, eating nutritious foods, and managing stress, you can create a balanced lifestyle that supports your long-term well-being.

Pro Tip

Start small—focus on one area of your health that you can improve today. Whether it’s increasing physical activity or drinking more water, small habits can make a big difference over time.

Find Your Balance: Must-Try Tips for Stress Management

Find Your Balance

Why Managing Stress is Essential

Stress is a natural part of life, but how you respond to it can significantly impact your mental and physical well-being. Learning to manage stress effectively is key to leading a balanced and fulfilling life. By incorporating practical strategies into your routine, you can reduce stress and find harmony in your day-to-day activities.

Must-Try Stress Management Tips

1. Practice Mindfulness and Meditation

Mindfulness helps you stay present and focused, reducing feelings of stress and anxiety. Spend a few minutes each day practicing deep breathing or guided meditation to center your thoughts and calm your mind.

2. Stay Active with Regular Exercise

Exercise is a powerful stress reliever. Whether it’s a brisk walk, yoga, or a workout session at the gym, physical activity releases endorphins that boost your mood and help combat stress.

3. Maintain a Healthy Work-Life Balance

Setting boundaries between work and personal life is crucial. Avoid overloading your schedule and make time for hobbies, family, and relaxation to maintain a balanced lifestyle.

4. Connect with Loved Ones

Sharing your thoughts and feelings with friends or family can help lighten your emotional load. Building a support system is an essential component of managing stress effectively.

5. Get Quality Sleep

Sleep is vital for stress recovery. Aim for 7-9 hours of quality sleep each night to give your body and mind the rest they need to function optimally.

The Role of Healthy Habits in Stress Reduction

Cultivating healthy habits, such as eating a balanced diet, staying hydrated, and limiting caffeine or alcohol intake, can improve your resilience to stress. A healthy body supports a calm and focused mind.

Simple Daily Practices for Balance

Start with small steps, like taking short breaks during the day, engaging in creative activities, or practicing gratitude. These practices can help shift your perspective and bring balance to your routine.

Pro Tip

Keep a journal to track your stress levels and identify triggers. Writing down your thoughts and solutions can help you manage stress more effectively over time.

Healthy Aging: Tips for Maintaining Physical and Mental Wellness

Healthy Aging

Why Healthy Aging Matters

Aging is a natural part of life, but maintaining physical and mental wellness can help you age gracefully and live a vibrant, fulfilling life. By adopting healthy habits, you can improve your quality of life, boost your energy, and stay active as you grow older.

Top Tips for Healthy Aging

1. Stay Physically Active

Regular exercise is essential for maintaining muscle strength, bone density, and overall mobility as you age. Activities like walking, swimming, and yoga improve cardiovascular health, flexibility, and balance while reducing the risk of chronic illnesses.

2. Eat Nutrient-Rich Foods

A balanced diet supports healthy aging by providing your body with the nutrients it needs. Focus on eating fruits, vegetables, whole grains, lean proteins, and healthy fats. Include foods rich in calcium and vitamin D for bone health and limit processed foods and sugary drinks.

3. Prioritize Mental Wellness

Mental health is just as important as physical health. Stay mentally sharp by engaging in activities like reading, puzzles, or learning a new skill. Social connections are also vital—maintain strong relationships with family and friends to prevent feelings of loneliness and isolation.

4. Get Regular Health Check-Ups

Preventive care is key to healthy aging. Schedule regular check-ups, screenings, and vaccinations to monitor your health and address potential issues early. Stay informed about your specific health needs as you age.

5. Stay Hydrated and Rest Well

Proper hydration and quality sleep are essential for overall health. Aim to drink enough water each day and establish a consistent sleep routine to help your body recover and recharge.

The Importance of a Positive Mindset

A positive outlook can greatly impact your aging journey. Focus on gratitude, celebrate small achievements, and embrace the changes that come with aging. Cultivating a positive mindset can boost your mental resilience and overall happiness.

Daily Practices for Healthy Aging

Small, consistent habits can make a big difference. Incorporate stretching exercises into your morning routine, stay socially active, and keep learning new things. These simple practices promote longevity and enhance your quality of life.

Pro Tip

Stay proactive—listen to your body and address any concerns promptly. Taking small steps today can help you enjoy a healthier, more vibrant tomorrow.

How to Choose the Right Health Insurance Plan for Your Family

Choosing the Right Health Insurance

Why Health Insurance is a Must-Have for Your Family

Ensuring your family has access to quality healthcare is one of the most important decisions you can make. Choosing the right health insurance plan not only protects your loved ones in times of need but also helps you manage medical expenses effectively. Here's how to make the right choice for your family's needs.

Key Factors to Consider When Choosing a Health Insurance Plan

1. Assess Your Family’s Healthcare Needs

Start by evaluating your family’s medical history, current health conditions, and expected healthcare requirements. Consider factors like regular doctor visits, ongoing medications, or any planned procedures to choose a plan that aligns with your needs.

2. Understand Coverage Options

Look for a plan that provides comprehensive coverage, including hospitalization, outpatient care, preventive services, maternity benefits, and pediatric care. Ensure the plan covers a wide range of medical conditions and services.

3. Check the Network of Providers

Ensure your preferred doctors, specialists, and hospitals are included in the insurer’s network. Choosing an in-network provider minimizes out-of-pocket expenses and ensures better coverage.

4. Compare Costs and Premiums

Evaluate the total cost of the plan, including monthly premiums, deductibles, copayments, and coinsurance. Balance affordability with the level of coverage provided to find a plan that fits your budget without compromising on essential benefits.

5. Review Additional Benefits

Many plans offer additional perks like wellness programs, telemedicine services, or fitness discounts. Consider these value-added benefits as they can enhance the overall usefulness of the plan.

Why It’s Important to Compare Plans

Comparing different plans allows you to find one that meets your specific needs. Look for online tools or consult with an insurance expert to get a clear understanding of what each plan offers and how it matches your family’s healthcare requirements.

How to Make an Informed Decision

Once you have a shortlist of potential plans, read the policy documents carefully. Pay attention to exclusions, waiting periods, and claim processes. A plan that aligns with your priorities and provides transparency in terms of benefits and costs is the ideal choice.

Pro Tip

Reassess your health insurance needs every year, especially if your family situation changes, such as having a new baby or a child leaving for college. Keeping your plan updated ensures continuous and relevant coverage.

Top Benefits of Choosing Flexible Health Insurance Plans

Flexible Health Insurance Plans

Why Flexibility in Health Insurance Matters

Life is unpredictable, and your healthcare needs can change at any time. Flexible health insurance plans adapt to your evolving requirements, offering a personalized approach to coverage. Whether you're an individual or managing your family’s healthcare, flexibility ensures you get the most out of your insurance plan.

Top Benefits of Flexible Health Insurance Plans

1. Tailored Coverage for Unique Needs

Flexible plans allow you to choose coverage options that fit your specific situation. Whether you need maternity care, dental benefits, or coverage for chronic conditions, you can customize your plan to include only what you need.

2. Budget-Friendly Options

With flexible plans, you have control over your premiums, deductibles, and copayments. This means you can adjust your plan to balance cost and coverage, ensuring affordability without compromising essential benefits.

3. Adaptability to Changing Life Circumstances

Major life events such as marriage, having a baby, or changing jobs can impact your health insurance needs. Flexible plans let you modify your coverage as your circumstances evolve, giving you peace of mind.

4. Wider Access to Providers

Many flexible plans include expansive provider networks, so you’re not restricted to specific hospitals or doctors. This is particularly beneficial for families or individuals who travel frequently.

5. Enhanced Preventive Care Options

Flexible health insurance plans often include preventive care services like regular check-ups, screenings, and wellness programs. These features help you maintain good health and catch potential issues early.

How to Choose the Right Flexible Plan

When selecting a flexible health insurance plan, compare options based on your healthcare priorities. Look for plans that allow you to add or remove coverage as needed, and ensure the plan includes benefits that are most relevant to your lifestyle and medical history.

Why Flexible Plans Are the Future of Healthcare

With the growing demand for personalized healthcare solutions, flexible insurance plans are becoming increasingly popular. They empower individuals and families to make informed choices, ensuring comprehensive yet cost-effective coverage.

Pro Tip

Review your plan annually to ensure it continues to meet your needs. Flexibility gives you the option to adjust your coverage as your health or financial situation changes, making it a long-term investment in your well-being.

The Role of Wellness Benefits in Your Health Insurance Plan

Wellness Benefits in Health Insurance

Why Wellness Benefits Are a Game-Changer in Health Insurance

Wellness benefits are no longer just an add-on in health insurance plans; they are an essential component for maintaining and improving overall health. From fitness incentives to mental health support, these benefits encourage proactive care and healthier lifestyles.

How Wellness Benefits Enhance Your Health

1. Encouraging Preventive Care

Many wellness benefits include access to regular health screenings, immunizations, and preventive check-ups. These services help identify potential health issues early, saving costs and improving outcomes.

2. Fitness and Lifestyle Programs

Insurance plans often offer gym memberships, discounts on fitness classes, or reimbursements for physical activities. These perks promote a more active lifestyle, reducing the risk of chronic conditions.

3. Mental Health Support

Wellness-focused plans often include counseling services, therapy sessions, or mindfulness apps. Prioritizing mental health helps you manage stress and improve your overall quality of life.

4. Nutritional Guidance

Some plans provide access to dietitians or nutritional programs to help you maintain a balanced diet. This is particularly useful for managing conditions like diabetes, hypertension, or obesity.

5. Rewards for Healthy Behavior

Many plans incentivize healthy habits, offering discounts on premiums or points redeemable for rewards. These programs make maintaining a healthy lifestyle even more appealing.

Why Include Wellness Benefits in Your Plan?

Incorporating wellness benefits into your health insurance plan is a proactive step toward better health. These benefits not only help you stay healthy but also reduce long-term medical expenses by addressing issues before they become severe.

How to Choose a Plan with the Right Wellness Benefits

Look for plans that align with your lifestyle and health goals. If you value fitness, prioritize plans with gym reimbursements. For mental health support, choose plans that cover therapy or counseling. Tailoring your plan ensures you maximize these benefits.

Pro Tip

Review your health insurance plan’s wellness offerings annually. Ensure they align with your current health goals, and take full advantage of available benefits to lead a healthier life.

Contact Us


Thank you for your interest in Refiine Health! Whether you have a question, feedback, or simply want to connect with us, we'd love to hear from you.


Contact Information

Address:-

3706 Kembery Drive, Schaumburg

Illinois 60173, US

E-mail:-

contact@refiinehealth.com

Privacy Policy